domingo, 2 de junho de 2013

Linhas & Fitas... - Threads & Ribbons

Agora é a vez de fazer alguns acessórios. Mesmo antes de construir os armários/prateleiras, decidi fazer alguns acessórios para colocar nelas.
Now some accessories. Even before I build the shelves, I decided to make some accessories too.

Minha loja vai diversificar sua linha de produtos. Inicialmente eu só ia colocar rolos de tecidos para vender. O projeto inicial, começado em 2007, era parte de um projeto de grupo e outras pessoas teriam lojas relacionadas a moda, acessórios, aviamentos, etc. e eu não poderia "fazer concorrência" a elas :) Agora o grupo retomou o projeto mas não posso mais participar dele (algo relacionado à estrutura, que agora tem que ser uma das especificadas pelos líderes). Isto me liberou para expandir minhas opções. Decidi então incluir fitas, linhas, rendas, e algumas máquinas de costura também. Coisas que uma costureira precisaria na época.
My store will diversify its range of products. Initially I was going to have only bolts of fabric there. The initial project was part of a group one and other people would have other stores related to fashion, notions, etc. and I couldn't overlap their target market :) Now that I've been disassociated from the group project (something related to the building structure, I'd have to use one designed by the new owners), I'm free to expand my options. I decided to include ribbons, threads, and some sewing machines too. Anything a seamstress would need back then.

Então achei na internet estes suportes de carretéis de linha da época, em ferro fundido. Muito charmosos.
And I saw these charming wrought iron thread holders on the internet. 


Decidi fazer algo similar, não só para exibir linhas à venda, mas ele mesmo poderia ser comprado. Usei peças que encontrei em lojas de artigos para montagem de bijutereria e contas pequenas. "Envelheci" a aparência brilhante das peças usando aquabetume.
I decided to make something similar, not only to display the threats for sale at the store, but which could be bought as well. I used jewelry findings, earring pins and some tiny beads. I "aged" the shiny look of the findings using water based bitumen. 


Os carretéis de linha são de um kit cortado a laser que comprei quando fui a Chicago em 2010. São uma criação de Bonnie Lavish. Acho que é o mesmo kit que pode ser comprado na Dragonfly online.
The thread spools were a laser cut kit I bought when I went to Chicago in 2010. They are by Bonnie Lavish. I believe it's the same kit you can buy from Dragonfly.


Bem, precisava também de um outro jeito de armazenar/expor os carretéis. Só para uma loja não seria o suficiente. Então achei uma imagem de caixa antiga da coats, fiz uns printáveis com ela. 
Well, just this display would not be enough. To be realistic, the store had to have more thread reels to sell, right? So I found a picture of an old coats reels box on the internet. I made a printable based on it.

Usei uns torneados em miniatura que tinha comprado há algum tempo e fiz mais carretéis de várias cores. Você acha esses torneados na Dragonfly também. 
 Then I used some tiny turnings I've had for some time - which you can also buy at Dragonfly - to make more thread reels. 


Aí colei um carretel de cada cor na lateral de cada caixa (caixa amarela para fios de algodão, caixa azul para de seda). 
Then I glued one reel of each color/thread on the side of each box. Yellow for cotton, blue boxes for silk. 


Esse recurso é muito usado ainda hoje: amarra-se uma "amostra" do produto na lateral da caixa que está na prateleira para o vendedor saber o que tem dentro. 
This resource is still in use today: they tie a "sample" of the item on the front side of the box that is on the shelf so that the salesperson knows what is inside.


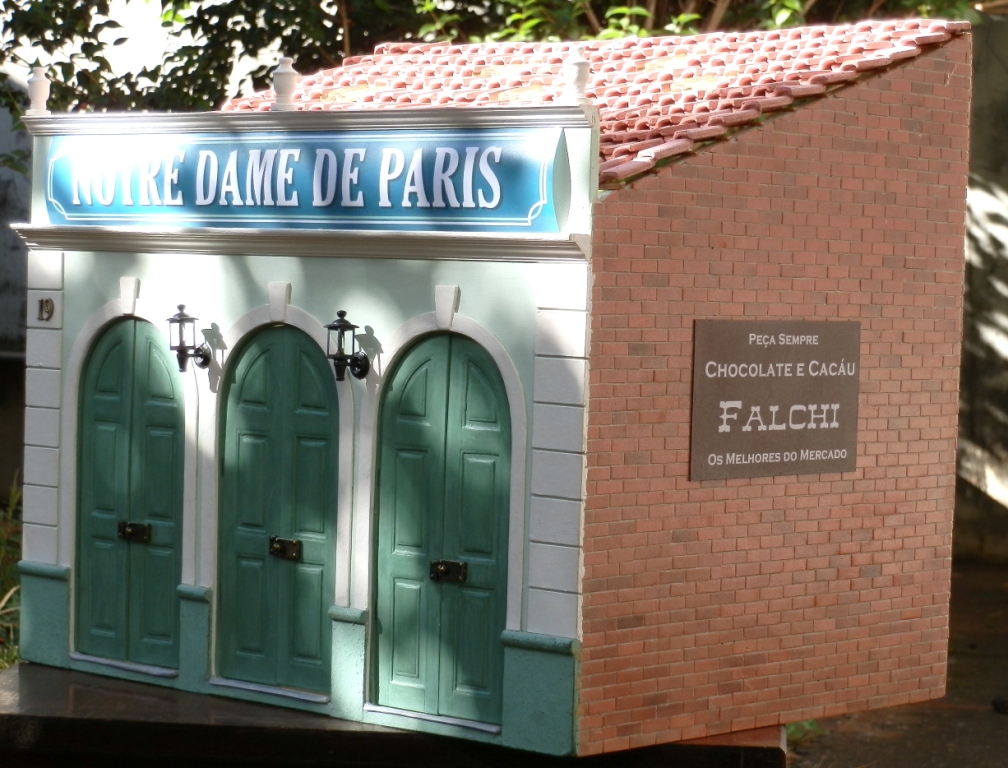
Uma loja da cidade. Tem tudo o que vc imaginar! 
A variety store in the city. They have anything you can imagine!
Tão comum que até a Coats bolou um "display" moderno de plástico assim, que se encaixa nas caixas deles!
 It's so common that Coats even created a modern plastic display to be used like that!


Também fiz uns carretéis de fitas e rendas, para serem colocados em um suporte em uma das prateleiras que ainda vou construir. Eu precisava saber o tamanho que esses suportes iam ter para poder construir as prateleiras com o tamanho/espaço correto... :)
I also made some ribbons and laces reels, to be placed on a special display on the shelf I'm still to build. I need to know how large they'll be so I can build the shelf accordingly.. :) 


o suporte será tingido com a mesma cor da estante.
The brackets will be stained the same color as the shelf.
Só depois de ter terminado meu suporte de fitas que achei um tutorial excelente para um exibidor de fitas na Nono Miniatures. Fica para a próxima, mas você pode aproveitar! 
After I finished my ribbon support, I found a great tutorial for a ribbon display at Nono Miniatures. Maybe next time I'll use it, but you can use it now!
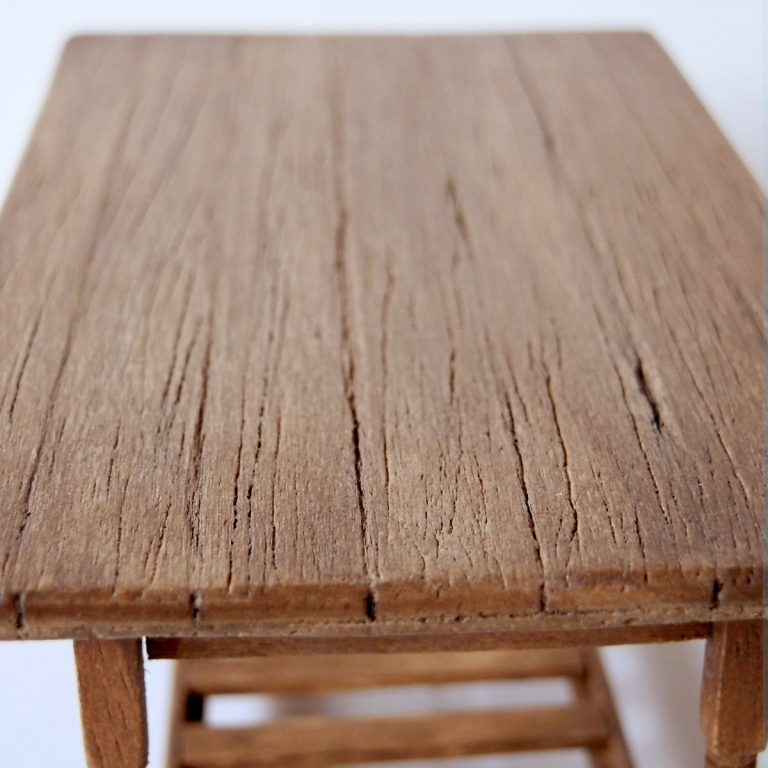
Pode não parecer, mas levei mais tempo fazendo essas "coisinhas" do que a mesa da postagem anterior!...
Who has never made miniature cannot imagine this, but it took me longer to finish these "little things" than it took me to make the whole table from the previous post!...
.
Obrigada! Thank you!
.

quinta-feira, 30 de maio de 2013

Mesa para corte - Table to cut the fabrics

Eu terei dois armários com prateleiras, um em cada lado da loja. Se eu também incluir balcões de atendimento em cada lado, não sobrará quase nenhum lugar para circulação dos meus "fregueses" em miniatura. Então decidi uma abordagem diferente. Uma que é muito usada em lojas de tecido aqui. Em vez de balcões, elas têm as prateleiras com tecidos e uma mesa grande em algum ponto da loja onde os rolos de tecidos são desenrolados para a apreciação do comprador, para cortar o tecido, etc. 
I'll have two store shelves, one on each side of the store. If I also include balconies on each side, it would leave almost no space in the middle of the store for my "customers" to circulate. So, I decided on a different approach. One that is often used in fabric stores here in the city. Instead of balconies, they have shelves full of fabrics and a large table somewhere where the salespeople unwind the fabric bolts for the customers to examine, cut the amount the customer wanted, etc. 

Dê uma olhada nessa linda mesa usada na minha loja de tecidos favorita aqui na cidade:
Look at this beautiful table used at my favorite fabrics store here: 


Eu queria usar uma dessas mesas de cozinha em miniatura, que geralmente vemos em cenários na internet com comida sendo preparada. Até que não são tão caras, mas juntando o custo do frete e a demora, desanima qualquer um! Isso se a alfândega não resolver aplicar a taxa de importação, aí o preço dobra, porque aplicam sobre o valor do frete também!...
I wanted to use one of those utility tables, that we often see in miniature preparation scenes all over the internet. I know they are not expensive. But keep in mind that whatever I buy, I have to pay for international shipping. Even if I could buy one on ebay for 99 cents, I'd have to pay $15 dollars for shipping. And if customs decides to charge me import taxes, the cost would double. Yes, they do apply taxes on shipping costs... 

Por isso resolvi fazer eu mesma o máximo de itens para a loja que conseguir fazer. E a mesa central definitivamente seria um deles! :)
So, I have made up my mind to make myself as many items I could. And the central table would definitely be one of them! :)

Não vou mostrar o passo-a-passo da elaboração da mesa. Na verdade, fiz uma de "teste", sem planejar nada. Só tirei umas medidas e fui logo cortando a madeira balsa. Eu tinha umas peças torneadas reaproveitadas, usadas originalmente como corrimão (guarda-corpo) que usei como pernas da mesa. Usei esse tutorial que achei na internet como base para montar minha mesa. 
I'm not going to show you step-by-step of my table. Actually, I didn't plan it at all. I took some measures, cut some wood, used some second-hand balusters I had, and just used this tutorial, by St. Albert Mini blog, as a base to make my own. 

Eu queria que a mesa tivesse uma aparência de bastante uso. Então, marquei os veios da madeira com uma ponta seca e consegui dar à maderia balsa um jeito gasto, mas limpo. Para conseguir isso, lixei a madeira e apliquei uma camada de verniz à base de água, fosco. Lixei ligeiramente de novo depois de seco. Quando trabalho com a balsa, eu sempre uso uma lixa muito fina, como 400 ou mais fina (ou então reaproveito lixas um pouco mais grossas mas muito usadas...) :) Daí diluí um pouquinho de aquabetume em água e misturei um pouco de verniz brilhante à base de água. O bom de fazer bem diluído é que vc vai aplicando as camadas até chegar no tom que deseja. Depois de seco, esfreguei cera de abelha e "poli" usando um saco de papel (kraft) que tenho guardado para esse tipo de uso. Isso mesmo, usei papel para dar polimento! Dá um brilho bem bonito e natural!
I wanted it to have a battered look. So, I emphasized the wood veins and gave the balsa wood a weathered, yet clean, look. To achieve that, I sanded the wood, and applied a coat of water based matte varnish. Slightly sanded again after dry. When working with balsa wood, I always use a very fine grit, like 400 or higher (or very well used lower grits...) :)  Then I diluted water based bitumen craft paint - you can use any water based brownish color you want - make a wash of it = a little bit of paint mixed with a lot of water. Apply as many coats as needed to achieve the desired shade. After dry, I rubbed beetle wax all over the surface. Then rub the wood with a piece of kraft paper. Yes, you read it correctly! I saved a paper bag for this kind of use only. It gives a nice natural shine! 


Ok, chega de falar. Aqui está o resultado final. Eu até queria fazer uma mesa diferente, mais parecida com a mesa da loja da minha amiga. Essa versão era só um teste. Mas gostei tanto do jeito que ficou a madeira, tão natural, que decidi ficar com ela e usar na loja! :)
Ok, so this is the final result. I was going to make a different one, more similar to the table at my friend's RL store. But I'm so pleased with the look I achieved on the wood that I decided to keep and use this one as is! :)


Obrigada! Thank you!
.

quarta-feira, 22 de maio de 2013

Construção terminada! - The building is finished!

Não vou escrever muito desta vez, só mostrar umas fotos... (tudo bem, pode dizer "ufa!...) :)
I won't write too much this time, just show some pictures... (it's ok, you can say "phew!...) :)


Obs: a loja é da época, mas na época (1890). Recém-reformada, praticamente. É como se tivessem pego uma construção antiga - estilo colonial - e reformado para um estilo mais "moderno", na época, um estilo "neo-clássico" eclético, muito em voga então! A reforma teria acontecido entre um ano, no máximo dois anos antes. Era uma época fervilhante, em termos de reformas. Tudo estava sendo renovado, por toda a parte! Se olhar fotos da virada do século 19 para o 20, tinha demolição e construção/reforma em quase toda rua da cidade, tanto em SP qto no Rio. Quis refletir isso...
Note: the store is from ~1890, but depicted as it would have been back then. It has been recently remodeled, something like one or two years before. It was formerly an old colonial style building, and it has been "updated" to look more "modern" (for that time), in a "neoclassic", eclectic style, very appreciated back then! From the last decade of 1800's to the 1920's, there were buildings being demolished and new ones being build all over Sao Paulo and Rio de Janeiro. If you look at pictures taken by the turn of the century, you'll see renovation works everywhere, and I wanted to reflect that...   

Por isso não quis "envelhecer" a estrutura, dar muitos sinais de desgastes. Foi algo mais sutil, como a ligeira oxidação do cobre da calha. Ou, por exemplo, um dos lados do prédio mostra como se a construção ao lado tivesse sido demolida - por isso o reboco quebrado e alguns tijolos aparentes. Porque logo vão construir algo novo no lugar. 
That's why I didn't want to "weather" the building, I didn't want it to have much signs of wear & tear - it was new! It was done in a very subtle way - like the gentle oxidation of the gutter, or the marks left by the demolition of the building on the next door, on the right side of the store. Soon another new building will occupy that spot.  

A loja venderá tecidos e outras coisinhas... :)
The store will sell fabrics and a few other things... :)

A próxima etapa é equipar o lado de dentro. Alguns itens foram comprados. A maioria eu farei eu mesma. Você gostaria que eu mostrasse como farei esses itens, à medida em que trabalhar neles?
Next step is to furnish the interior. Some items are ready-made. Most I'll make myself. Would you like me to show you the items I make, as I work on them?

Obrigada! Thank you!
.

segunda-feira, 20 de maio de 2013

Uma nota 6,5 - A C- Grade

Bem, desde que comprei as telhas em miniatura, em 2008, nunca mais mexi nelas. Ficaram bem empacotadas em uma caixa. Quando finalmente as retirei para usar, fiquei bem preocupada e um tanto desapontada. Elas são muito fofas! Mas nesse meio-tempo, aprendendo com excelentes miniaturistas do mundo todo, desenvolvi um olho para miniaturas e uma preferência pelo realismo. E só agora notei que as telhas são meio grossas demais para serem realistas o bastante. O que posso dizer? Fiquei mais exigente!!!
Well, since I bought the miniature roof tiles, in 2008, I never touched them. They remained well packed in a box. When I finally got them out to use, I got very concerned and a little disappointed. They are cute. Really cute! But over the years, learning from excellent miniaturists worldwide, I have developed an eye for miniatures and a preference for realism. And only now I noticed they are a little too thick to look realistic enough. What can I say, the bar has been raised!!! 

O principal problema, na verdade, é que elas não se encaixam direito. A menos que use bastante cola, simplesmente não se encaixam e ficam soltas. Tentei entalhá-las um pouco mais com a dremel, e melhorou um pouco as coisas:
The main problem actually was that they don't have a snug fit. Unless a lot of glue is used, they just won't fit and will become loose. I tried to carve them a little with a dremel bit, and it did improve things a little:


À esquerda, o encaixe "normal" e à direita, depois de eu tentar alterar...
On the left, the 'normal' fit, and on the right, after I tried to adjust...
Telhas romanas no tamanho normal. Observe como o encaixe é perfeito e como são mais finas!Life size "Roman" tiles. See how they fit perfectly and how thinner they are?
Só que depois de trabalhar umas 50 telhas e ficar com uma bandeja de isopor cheia de pó e as mãos e músculos doloridos (com fibromialgia, qualquer esforço repetitivo ou de longa duração é penoso) simplesmente desisti. Preferiria fazer minhas próprias telhas se tivesse que "consertar" todas elas...
But after about 50 of them and a foam tray full of dust and sore hands (I have fibromyalgia and holding pressure for too long is painful) I just gave up. I'd rather make my own tiles if I had to "fix" all 300 of them... 
par do verso à esquerda, frente à direita. No par: original à esquerda, retocada à direita.
the pair on the left is the back and on the right is the front. The ones on the left on each pair are the original one and on the right are the ones I tried to adjust.
E talvez ainda faça isso! Eu acabei decidindo usar as telhas como são. Afinal de contas, venho guardando-as especialmente para este projeto há anos, e se não usar, vão ficar só ocupando espaço. Mas se eu descobrir um jeito de fazer um telhado que se pareça com este antigo, posso até arrancar todas e refazer todo o telhado, algum dia...
And I still might! I decided to use the tiles as they were. After all, I already had them for this project, and if not used, they'll just take up space. But if I find a way to make a roof that looks like this old one, I might rip those tiles off and completely re-do the roof, someday...


Descobri alguns vídeos muito interessantes sobre a fabricação de telhas. Clique nos links abaixo para assisti-los no Youtube ou visitar a página mencionada.

  • Talvez eu use esta técnica - ele fez telhas usando papel kraft.
  • Ou esta aqui, usando papelão ondulado - só que funciona melhor para escalas menores...
  • E é assim que telhas na escala normal são feitas. Assista um vídeo em inglês ou em português (não são o mesmo vídeo)
  • Ou talvez eu consiga montar uma prensa manual, como esta aqui :)
  • Espere! Dois caras no sul do Brasil já criaram uma fábrica de tijolos e telhas em miniatura, fica no museu deles sobre máquinas a vapor. Veja este vídeo sobre a parte da olaria ou visite a página do museu
  • Ou talvez eu consiga convencer este cara a fazer uma máquina em miniatura igualzinha para mim!!!


Bem, não custa sonhar... :)
I did find some interesting videos about ceramic roof tile manufacture. Click on the links to watch them on Youtube or visit the page mentioned:

  • Maybe I could use this guy's technique - he made tiles out of  'cereal box' cardboard. 
  • Or this one, using corrugated board - except that it would only work for smaller scales...
  • And this is how real life roof tiles are made. Watch a video in English or in Portuguese (not the same video)
  • Or maybe I could make them with a manual press, just like this one, If I can ever make a miniature version of that press :)
  • But wait! Some guys in the South of Brazil already created a miniature tiles factory, it's in their museum about steam machines. Check this video about the brick yard sector or visit their page
  • Or maybe I could convince this guy to make a miniature machine like that for me!!!
Well, one can dream... :)


Vamos ao telhado, então... O primeiro passo para instalar o telhado é colocar o madeiramento:
To the roof, then... The first step to lay the roof was to place the wood beams:


Também tive que cortar algumas telhas pela metade para dar acabamento no lado esquerdo:
I also had to cut some tiles in half to finish the left side:


Enfim, este é o resultado final. Parece legal, mas não está perfeito. Daí a nota que me dei. Há muitas falhas entre as telhas e linhas. Veja a diferença entre a versão miniatura vista por baixo e uma foto que tirei do telhado da nossa garagem. Nada realista!!!
Anyhow, this is the final result. It looks ok, but far from perfect. Hence the grade I gave myself. There are many gaps between them. Check the difference between the miniature version and a picture I took from our garage roof. Not realistic at all!


Meu telhado em miniatura visto por baixo...
My miniature roof as seen from below...

... e nosso telhado de verdade visto por baixo.
...and our life size roof seen from below.

Subindo um pouco mais o ponto de vista, dá para ver as falhas de encaixe!
A little higher point of view shows the gaps in the fitting!
Pelo menos as telhas de resina (apesar de terem amarelado com o decorrer do tempo), realmente permitem a iluminação do ambiente, como era esperado!
At least, the resin tiles (though yellowed since I bought them in 2008), do cast some light inside, as intended!


Eis o telhado visto por cima, pela parte dos fundos da loja:
Here is the roof as seen from above, from the back of the store:


E visto pela frente.
And from the front.


Que nota você daria? :)
How would you grade it? :)

Obrigada! Thank you!
.

sábado, 18 de maio de 2013

Calha - Gutter

Não temos condições climáticas extremas no Brasil, normalmente. Os telhados são importantes para fornecer sombra e proteger do calor ou para dar abrigo contra chuva. E chove bastante por aqui! Chuvas fortes... Então, uma calha adequada é importante...
We don't have extreme weather conditions in Brazil, usually. Roofs are important to provide some shadow and protect from the heat or to give shelter from rain. And it rains a lot here! Heavy rain... Therefore, a proper gutter is important...


Primeiro cotei um retângulo em um papel qualquer que tinha por perto e dobrei entre a platibanda e a viga inferior do telhado (que só estava colocada, sem cola). Usei as medidas obtidas para fazer a calha "verdadeira". Usei uma cartolina preta que já tinha, e cortei e fiz os vincos usando as medidas já obtidas com o papel teste. A cartolina que eu tinha não era longa o bastante para fazer uma calha inteiriça, então colei no meio usando uma pequena tira, como mostrado na foto.
First I cut a rectangle of any paper I had nearby and folded it between the parapet and the lower beam (which was just positioned, not glued yet). I used the measures obtained with that scrap paper to make the "real" gutter. I got some black Bristol board I had, cut it accordingly, scored the folds using the measures obtained before. The black paper I had was not as long as needed, so I joined them in the middle using a small strip, as shown in the picture.


Você deve ter notado uma sombra verde suave. Isso é porque as calhas na vida real geralmente são feitas de metal. No meu caso, seria feita de cobre. E, mesmo tendo sido pintada de preto para previnir a oxidação, é impossível impedir totalmente que ocorra nas juntas e dobras. E a oxidação do cobre é verde (não é cor de ferrugem, como no ferro). A estrutura da loja é relativamente nova, como seria uma loja na época, então simulei um desgaste pelo tempo bem suave, sempre. Só um pouquinho de tinta, então! Neste caso usei uma tinta glaze importada que já tinha comprado em uma promoção, da marca Delta, cor Turquoise.
You may have noticed a dim shade of green. That's because in life size those gutters would be made of metal. Mine is supposed to be made of copper. And even though it was painted black to prevent "rusting" (oxidation), some is inevitable at joints and bends. And copper oxidation is green (not rusty or reddish like it happens on iron). The store building is supposed to be relatively new, so I used a light hand whenever weathering anything. Just a little speck of paint, then! I used Delta Turquoise Glaze for that.


Hora de preparar o "tubo de queda" ou coletor. Usei canudos dobráveis para isso, os mais largos. Dois foram dobrados em um ângulo reto (de 90º) e o outro em um ângulo mais aberto - não medi, foi a olho mesmo. Eu não queria uma aparência "serrilhada" dos canudinhos, seria um visual moderno demais para joelhos de canos! Então, usei massa para preencher os vãos e depois apliquei uma camada generosa de cola para madeira. Acrescenta um pouco de espessura, mas isso até que é bom para o visual.
Time to prepare the downspout. I used bendable drinking straws for that. Two were bent at a right angle (90º) and the other one at a wider angle - eyeballed, I did not measure it. I did not want the elbows to have a "corrugated tube" look, this would be too modern! So, I filled the spaces with grout and, after it dried, I applied a generous coat of Elmer's glue. It does add some extra width, but that looks good, actually. 


por sorte esses furos encaixavam direitinho para secar!
These miter holes were ideal to place the straws to dry!
Depois de seco, lixei os "joelhos" para obter um acabamento liso. Primeiro eu pintei os canudos com verniz spray preto. Depois mudei de idéia e usei o mesmo esmalte preto fosco para unhas de antes. Ele dá um acabamento mais texturizado que parece mais realista...
After the glue dried, I sanded the "elbows" to get a smooth finish. First I spray painted them black. Then I changed my mind and used that matte black nail I had used before on the door hinges. It gave the spout a more textured finish that looks more realistic...


Cortei uma das curvas em 90º para colar sob um furo que fiz com um furador no final da calha. Usei um furador baratinho que achei em uma loja de 1,99. Para minha sorte, tem o mesmo diâmetro que os canudos.
I cut one of the 90º curves to glue below a hole I punched at the end of the gutter. I used a cheap puncher I got at a dollar store. Luckily, it has the same diameter as the straws. 


desculpe a foto borrada, só vi depois!
sorry for the blurry picture, I only noticed it later!
Um dos lados da calha foi colado à viga, que finalmente foi colada no lugar.
One side of the "gutter" is glued to the beam, which is finally glued to place as well. The other side was glued directly to the wall. 


Usei um pequeno pedaço de fita de isolamento para janelas nas pontas dos canudos, onde seriam colados em algum lugar. É uma fita de espuma, com um lado adesivado. EVA pode funcionar também.
I used a tiny piece of insulation tape now at the tips of the straws, where they'd be glued to something. It's a foamy tape, and there is an adhesive tape on one of the sides. EVA (or foam board) might work as well.

Usei o próprio canudo para marcar onde cortar.
I used the straw to mark where to cut. 


Você pode cortar com tesoura ou usar o furador aqui também.
You can cut with scissors or use the punch here too.  


Apliquei cola na parte interna do canudo e inseri a espuma, lado adesivado para fora. Isto dá mais firmeza ao canudo e facilita colar um canudo no outro ou à parede!
Apply some glue inside the straw and insert the foam, sticky tape facing out. This adds some firmness to the straw and makes it easier to glue straw to straw or straw to the wall!


Usei o spray preto para pintar um pedaço de papel e cortei umas tirinhas finas de uns 2mm. Procure usar uma canetinha preta para pintar os lados do papel de preto também, ou o branco do papel aparecerá e não ficará natural! Uma tira de papel foi enrolada na junção dos dois canudos usados para alcançar a altura necessária para o coletor.
I spray painted some paper (black) and cut some tiny 1/8" strips. Make sure to use a marker to paint the sides of the paper black too, or the white will show and it won't look natural! One strip of paper was wrapped around the two straws were they were joined (to achieve the necessary height for the downspout).

diferença entre lateral do papel pintado e sem pintar.
See the difference when you also paint the sides of the paper strip?
Outras tiras foram cortadas e dobradas para serem usadas como braçadeiras - para manter o cano "pregado" à parede.
the other strips were cut and folded to make the downspout brackets - to secure them to the wall. 


Eis a vista do alto do cano coletor já colado no lugar. Certifique-se que está alinhado ao buraco de saída da água na calha, já furado antes. Usei de novo uma tinta da Delta, chamada Sheer Metalics, Copper (cobre) para pintar o lado interno do canudo simulando um cano de cobre...
This is the top view of the downspout glued to place. Make sure it's aligned to the outlet hole previously punched. I used Delta Sheer Metalics - Copper - to paint inside the straw and make it look like a copper pipe...


Aqui é a vista lateral. O "cano" interno e o interno devem estar alinhados neste aspecto também (linha vermelha)
The side view. The inside and the outside straws/downspouts should be aligned too (red line).


E aqui está o cano coletor instalado na lateral direita da minha loja!
And here is the downspout installed on the right side of my building! 


Obrigada! Thank you!
.

Related

Related Posts Plugin Blogger...